Thursday, July 29, 2010

Getting Kids Going

Exercise is an important part of growing strong healthy kids. But exercising doesn't have to be the stringent regime and doesn't have to turn you into a Drill Sargent.
Kids who engage in regular physical activity are stronger, more confident, and have a better outlook on life.

Here is a simple guide to helping you little ones get moving and stay healthy.

This is a suggested Activity Chart from Kids Health


Age
Minimum Daily Activity
Comments
Infant
No specific requirements
Physical activity should encourage motor development
Toddler
1½ hours
30 minutes planned physical activity AND 60 minutes unstructured physical activity (free play)
Preschooler
2 hours
60 minutes planned physical activity AND 60 minutes unstructured physical activity (free play)
School Age
1 hour or more
 Break up into bouts of 15 minutes or more

TEENS

Infants and young children should not be inactive for prolonged periods of time — no more than 1 hour unless they're sleeping. And school-age children should not be inactive for periods longer than 2 hours.


Planned play doesn't have to be gymnastics or little league, though those do qualify. It can be as simple as taking a walk, going for a bike ride, dancing, or playing catch. Free Play is just that where you don't guide a child's imagination, letting them climb, spin, run, play tag, whatever there little hearts (& legs) desire.

 Here are a few websites for more information and ideas for helping get your little one in a grove!

Kids Health
Let's Move Iniative
BAM! (Body and Mind) kids health by the CDC
Kids.Gov

Saturday, July 17, 2010

Kiddie Clean Up

Kids are messy. But with a little paitence and  ingenuity you can clear the clutter and organize the chaos (and even get the little ones  to pitch in!)
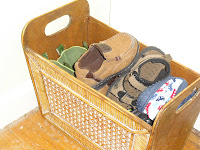
  • Utilize a storage caddy. (The one pictured was $1 at Target) Storage caddies work as both an organizing tool and a nifty clean up device. With small children, Moms can use a storage caddie to keep diapers, wipes, and binkies on hand as you move from room to room or out in the backyard. This way you don't have to keep running back to the changing table. Older kids and toddlers can use them to help clean up their toys, books, shoes, etc. They can load them up and carry them to their room/toy box. They can also help limit the mess by regulating how much a child can take with them. You can keep a child from leaving every toy they own strewn about the house by telling them they can only take out toys that can fit into the caddy and they have to  put back whatever they take out before getting more. This way clean up is always just one caddy load.
  • Stylish and Creative Storage Solutions. Just because you have kids doesn't mean that your personal style has to go out the window. Yes, your furniture should be child friendly - to prevent the heartbreak and tears that come when little chocolate hand prints show up- but you don't have to live in a world of primary colors and cartoon characters.  Use storage ottomans to hide toys and magazine holders to keep little shoes in order without sacrificing decor.  This not only helps your home have a bit of an adult feel, it also helps organize your kids, by giving everything a place and teaching them where to find and put their things.

Tuesday, July 13, 2010

Homemade Marionettes

These homemade marionettes are fun to make and provide hours of fun once completed. Make a bunch and put on your own retelling of your favorite fairy tales- Or make up your own! This is the perfect rainy day activity as it takes some time to put together and then provides hours of fun when done!

What You Need: Plastic cups of various sizes (one large & 5 medium per puppet), Yarn, cardboard, felt & decorations, glue, scissors,

What to Do: 

Parents may want to do these first steps before hand, so that children just have to decorate and assemble.  
  • Cut a lower case "t" out of cardboard for the puppet control and poke a hole in each of the four ends.
  • Put a slit or small hole in the bottom of each plastic cup. 
  • Put a slit or small hole in the back of the large cup (Body) and two of the smaller cups (hands) near the lip. Leave the  head and feet cups with just holes in the bottoms.
  • Put two slits on the side of the big cup near the bottom of the cup. These will be where the arms attach.
Once all the cutting is done, you & your child can assemble and decorate your marionette.
  1. Tie a knot on the end of the yarn and slip it through one of the arm holes. Cut a length of string as desired for arms. Slip the end of the yarn through the bottom of one of the hand cups (a cup with a hole in the bottom and side). Repeat on the other side. 
  2. Slip the yarn through the hole in the bottom of the large cup, the body. Pull a large length (excess can be trimmed later) through - think of this string as the spine of the puppet, connecting the head to the legs. Cut and tie knot in the end closest to the bottom of the cup (top of the puppet) Slip the knot through the bottom a small cup (head) so that the bottoms are facing each other. (Make sure to leave a bit of yarn for the neck and a bit to attach to the control.
  3. Cut a length of yarn for the legs, tie it at the midway point to the "spine"  so that you have to equal length legs hanging from inside the body. Slip one end of the yarn through a foot cup and tie a knot to secure. Then repeat with the other leg and foot. At this point your puppet should be complete (without the controls) and look like the picture below (it's sideways  now but this will be corrected shortly).
Decorate the Puppet with felt, pom poms, feathers and attach with the glue. Use permanent marker to draw a face.

For the controls:
  • Slip lengths of yarn through each of the holes in the cardboard cut out. 
  • Attach the top of the "t" to the yarn inside the head. 
  • Attach the sides of the "t" to the hands (again by slipping into the holes in the sides of the hand cups.
  • Attach the bottom of the "t" to the body by slipping the yarn into the hole in the back of the body near the lip. 

Once it's dry, Practice using the controls  to manipulate your puppet.

Monday, July 12, 2010

Plastic Spoon Puppets

This is a cheap and easy craft that you can do again & again  and can lead to hours of role playing fun!

What You Need: 
Plastic Spoons, Felt, Permanent Markers, Scissor, Glue, Pipe Cleaners

What To Do:
Draw faces on to the back side of the spoons with permanent markers. Carefully cut clothing, hair, hats, etc from felt. (Note: Fold clothing in half and use scissor to make a slit to slide spoon handle in) Glue hair on spoon. Wrap a pipe cleaner around the handle to make arms.

inspired by a post by Inspired Crafter

Sunday, July 11, 2010

Stick Raft

A great craft that you can do with items from the backyard!  Have the kids gather the supplies, construct rafts and find a puddle and race!

What You Need:
Sticks, twine/thread, leaf/paper

What To Do: Gather enough twigs and sticks to make a raft base, one longer twig for a mast, and four to help steady and brace the raft.  Break or snip the branches for the base with garden shears to make them almost even - doesn't have to be perfect.  Lay the twigs side by side, holding them firmly, lace the thread around the edge of  the sticks, weaving over and under until they are secure. Repeat on the other edge. Take the four twigs you gathered for bracing the raft and split into two groups of two. Tie the two twigs of each group together. Attach one group onto the base at the back on the other to the front going across (opposite) the twigs of the raft. The raft should now be firm and steady with relatively little wiggle. Turn over and work the longer mast twig in between the twigs of both the base and the front brace. Use a large leaf or a piece of paper to attach to the mast as a sail.

You now have a stick raft, that floats!